How to manage products?

Manage rental products
In this section, we’re going to look at how to simply handle your products and add them to the system and get your warehouse built up so you can get full control. Good product presentation is everything, so make sure to use great pictures and film when presenting your products on your website. You will learn:
  • How to add products
  • How to upload photos and videos
  • How to set up product categories

Contents

How to add products

Selecting Products in the Admin menu on the left opens the Products page and displays the list of existing products, which the user can easily search for, sort or filter by product type.

Manage rental products

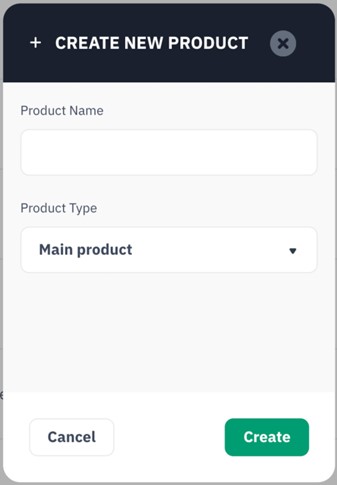
Adding products is a simple process. Clicking on the “Add Product” button opens a pop-up to enter a product name and select the product type as “Main product, accessory or sales product”.

Manage rental products

After selecting the product name and type, you will be taken to the product page which allows you to enter product information such as: description, assign the product categories, multimedia (including photos and video), associated accessories and merchandise, associated activities etc.

  • Description – Describe your product. This text is displayed on the product page under the tab “About the product”.
  • Applications – Description of activities relevant to this product, displayed on the product page in the “Applications” tab.
  • More details – More technical details can be given about the product, which will be visible under the product page “Details”.
  • Published / Inactive – Publishing a product will include it on the active website. If you set it to Inactive, it will be hidden from public users. The product can still be seen with the “see live” button by admin users inside the product itself.
  • Categories – Product categories act as filters for the end user on the Shop Products page (list). Several categories can be assigned to one product.
  • Searchable tags – Tags are words or combinations of words that will be used by the search function on the Shop page.
  • Display Priority – Display Priority is used to sort products when they are displayed to the end user on the website. For example, a more popular product may be given higher priority and placed at the top of the list.
  • Purchase Time – This field represents the number of days needed to purchase another product (inventory) for the same product. This can be useful in case virtual products are used. Virtual items have inventory that can be ordered in advance by users, but which has not yet been purchased. Therefore, during the purchase period, they are not available for ordering, but become available for the time after that period.

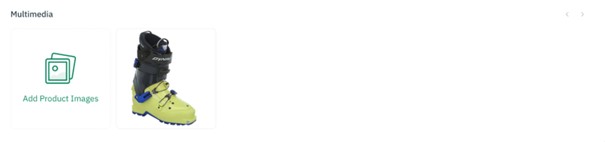
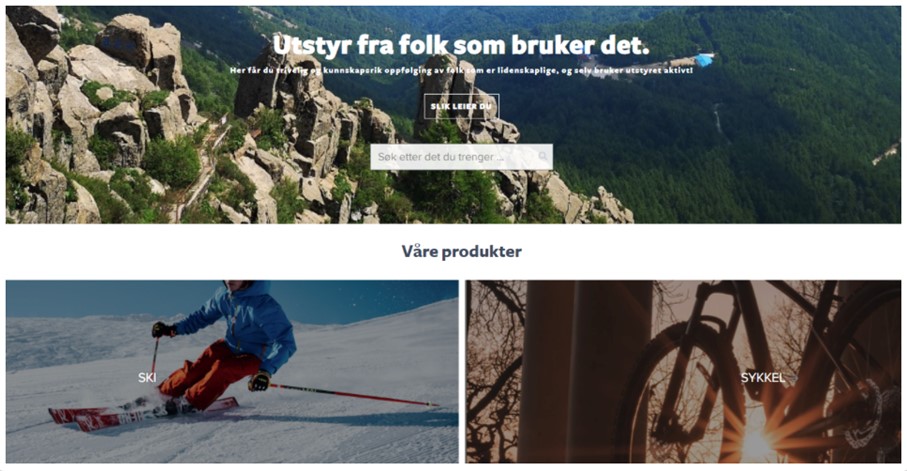
The newly added product will look like this on the site:

Manage rental products

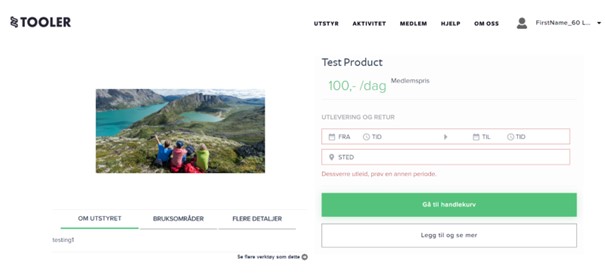
Note : A first red message indicating that the product is not available is displayed first, until stock items are completed for this product.

How to upload photos and videos

  • You can use video and photos both as part of the product presentation or the blog and activity page
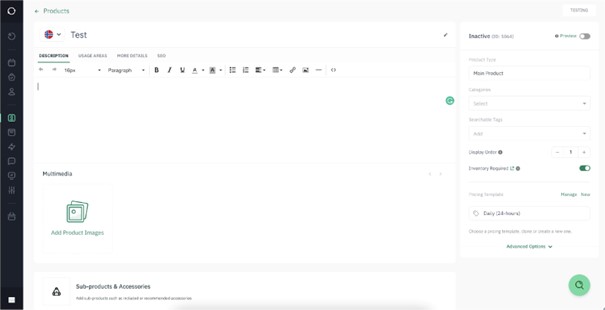
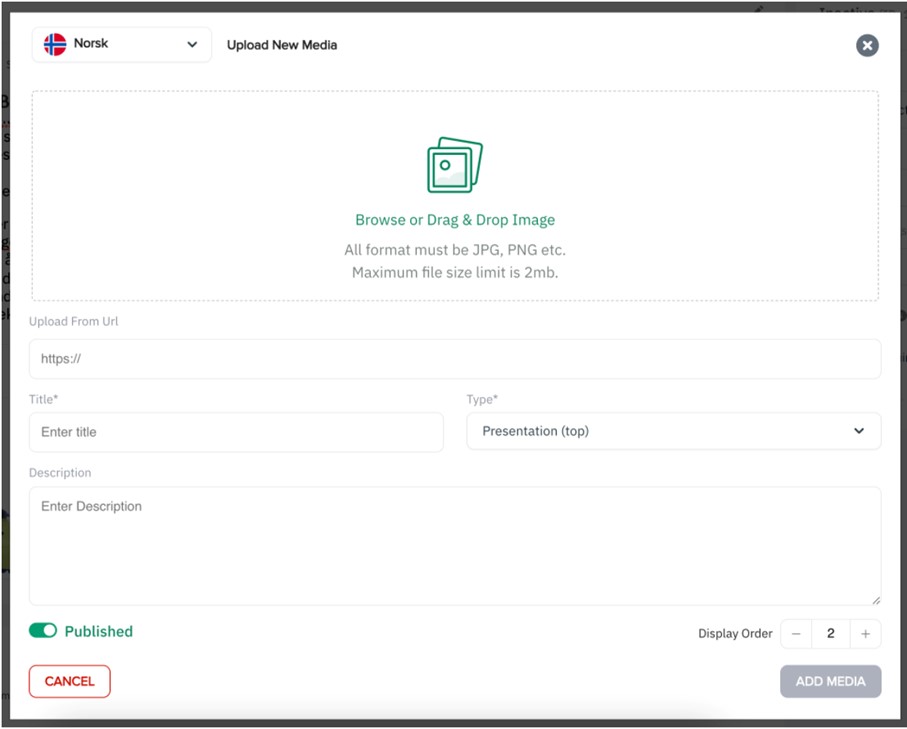
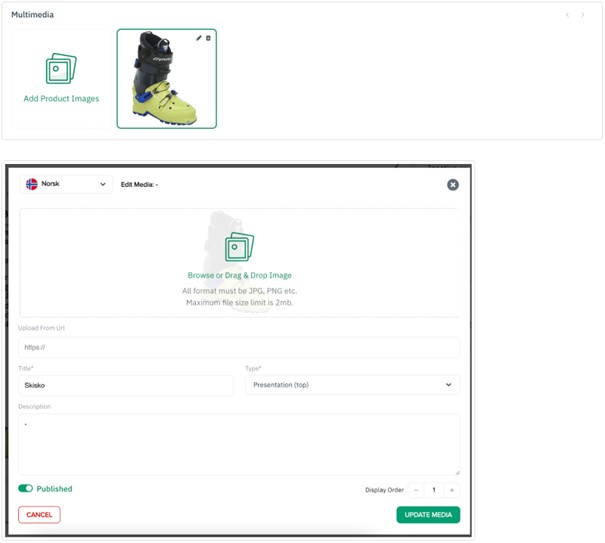
  • Photos and videos are added under the Multimedia section under the product or blog.

Manage rental products

  • New photos and videos are added with the “ADD” button. Here you can upload photos from your computer, insert a link, link to Youtube or Vimeo. For images, approved formats are * .png and * .jpg. and the size you can upload is a maximum of 2 MB.

Manage rental products

  • NB! Remember that the image / video is to be displayed on the website and must be set to “Published”. If the switch is set to Inactive, the image will be hidden from the user.
  • Type – here you choose which type of multimedia you want and where they are published on the website:

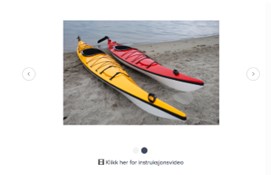
Product presentation picture. Appears at the top of the product page. You can have several pictures in a carousel so that the customer can browse:

Manage rental products

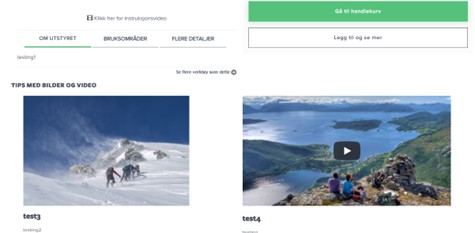
Product instruction multimedia. Appears at the bottom of the website. By adding text you can comment on the image. Can be used for instructional images, Youtube or Vimeo:

Manage rental products

  • Display order – In which order you want the pictures / video to be displayed on the website.
  • Update multimedia. If you want to change the image / video, press the pencil, at the top right of the image a multimedia settings pop-up will appear.

If there is a desire or need to compress images or take sections of images, there are also some simple web tools and free programs for this. Two examples here:

  • This is ok for “cropping” ie cutting in photos: https://resizeimage.net/
  • While this is very good for reducing file size on images. Here is everything you need to do and drag the image into the browser, widely used by us: https://tinypng.com/

Manage rental products

Note: If you change or upload an image on your website, Google and social media will not see the change until 24 hours have elapsed. In practice, this means that by sharing the link on, for example, Facebook, the image that is previewed will be updated about 24 hours after you have updated your website.

How to set up product categories

For aesthetic reasons or to sort your products so that customers can find them more easily, you can choose to create categories.

(In most cases, categories are created when the Sharefox team builds the front page for you. If you want to create them at a later time, you must contact support@sharefox.no to set up categories).
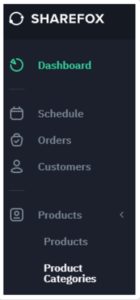
Manage rental products

Step 1: Go to Admin
  • Go to Products and select Product categories. (See instructions below).

Manage rental products

  • Click the ADD button.

Manage rental products

  • A new category entry will be created.


Step 2: How to customize the product category

To configure your category correctly, here are some suggestions to help you:

  • Product category, slug, display text and title SEO can be the same (for the URL slug: no capital letters, no spaces and no non-Latin characters like ø, å,…).
  • Check box for categories: if you check it, the platform will check the category to be rented. If you do not, the platform will read as “sales”, so the category will appear in “accessories” if the customer gets access from the store.
  • Image display: if the box is not clicked on the homepage, the name of the category will appear in a gray box.
  • Display Priority displays the categories in the order you want.
  • Number of products is the number of products associated with the specific category.

When you have finished customizing, press this button to save the new category: Manage rental products

  • Remember to repeat the process in English or another language if necessary. You can change the language you want to change the products for in the top right corner. Here we have also made an article on how to set up the products in several languages.


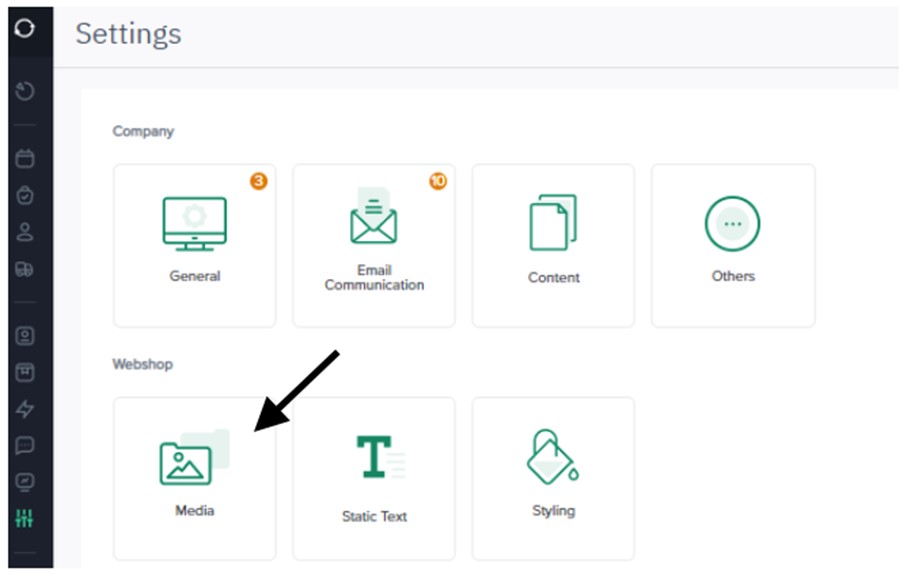
Step 3: To add an image to the Desktop and Mobile tab
  • Go to Settings and select Media.

Manage rental products

  • Add your image to custom files (the image can not be larger than 2.5 MB).
Manage rental products
  • Copy the URL that was created.
  • Return to Products and then to Product categories.
  • Tap Edit on the tab for which you want to upload the images.
  • Enter the URL of the Image Desktop URL and Image Mobile URL .
  • Save updates / changes.

NOTE : If you do not assign a product to the category, the category will not appear on the homepage

Learn more about the rental software